여러 책을 통해 Rust 문법을 대충 한번 훑어보고, 이해가 되지 않는 부분은 실제 Rust 예제를 만들어 보기 시작했고, 이런 저런 예제들을 만들다가 실제 서비스에서 필요한 기능들을 하면 좋겠다고 생각해 하나하나 기능을 합쳐서 하나의 프로젝트를 만들었다. 새벽까지 코딩하면서 이렇게 열정적이었던 때가 언제였던가 하는 생각을 하게 만드는 언어가 바로 Rust인 것 같다. 비즈니스와 관련없이 순수하게 개인적으로 호기심이 많이 같던 언어는 없었던 것 같다. 프로젝트 관련 내용들은 Github에 axum-rusty라는 이름으로 공유했으니 참고하실 분들은 참고하세요. 피드백도 환영합니다. 해당 프로젝트는 Clean Architecture 기반으로 로그인, Todo(할일) 등록 등 API를 구현한 기본적인 프로젝트입니다. 아래는 그 관련된 사항들을 정리했습니다.
Rust의 구현 포인트
1. Axum 구현 포인트
-
Axum의 특징은 매크로가 없는 API로 요청을 라우팅을 한다. 그리고 Extractor를 사용하여 요청을 선언적으로 분석하며, 최소한의 보일러 플레이트로 응답 생성을 하게 한다. 또, 미들웨어, 서비스, 유틸리티 tower 및 tower-http 생태계를 최대한 활용한다. Tokio에서 만들어서 Tokio 궁합이 잘 맞아 성능이 좋을 것 같고 비동기 Rust 생태계와도 궁합이 잘 맞을 것 같다.
-
Axum은 Router를 정의하고 .nest() 함수를 통해 중첩시킬 수 있다. 그리고 DI 콘테이너 개념을 주입시켜 modules를 호출할 수 있게 해준다. 자세한 건 DI에서 설명한다.
let todo_router = Router::new()
    .route("/", get(find_todo).post(create_todo))
    .route("/:id", get(get_todo).patch(update_todo).put(upsert_todo).delete(delete_todo),);

let app = Router::new()
    .nest("/:v/hc", hc_router)
    .nest("/:v/todos", todo_router)
    //.layer(Extension(modules));
.with_state(modules);- 핸들러의 파라미터에 Path나 Query, Body에서는 JSON으로 요청 값들을 받을 수 있다. 특히 JSON 요청의 경우는 Axum은 Serde 크레이트의 Deserialize가 구현된 구조체면, Axum이 자동으로 구조체에 값을 채운다. 그리고 JSON의 각 필드에 크레이트와 결합하여 필드값의 유효성 검사 기능을 추가할 수 있다.
#[derive(Deserialize, Debug, Validate)]
#[serde(rename_all = "camelCase")]
pub struct JsonCreateTodo {
    #[validate(
        length(min = 1, message = "`title` is empty."),
        required(message = "`title` is null.")
    )]
    pub title: Option<String>,
    #[validate(required(message = "`description` is null."))]
    pub description: Option<String>,
}- JSON을 응답할 경우 Json.Serialize를 사용하여 모델을 자동으로 JSON 형식으로 전환해 준다.
#[derive(Debug, Serialize)]
#[serde(rename_all = "camelCase")]
pub struct JsonTodo {
    pub id: String,
    pub title: String,
    pub description: String,
    pub status: JsonTodoStatus,
    pub created_at: String,
    pub updated_at: String,
}
2. sqlx 구현 포인트
- sqlx는 DB연결, 쿼리 구성, 트랜젝션을 지원하고 명령어 기능도 있어서 데이터베이스를 생성하고 테이블, 데이터 등록 등을 실행해 DB 초기 셋팅을 도와줄 수 있다.
> sqlx database create
> sqlx migrate run- DB Pool은 Arc방식을 사용한다. 병렬처리에서도 안전하게 해준다. Arc(Atomic Reference Counted)는 참조 카운팅을 위해 atomic 연산을 사용한다. atomic 연산은 멀티스레드 환경에서도 안전하게 작동하게 된다는 의미이다.
#[derive(Clone)]
pub struct Db(pub(crate) Arc<Pool<Postgres>>);

impl Db {
    pub async fn new() -> Db {
        let pool = PgPoolOptions::new()
            .max_connections(10)
            .connect(&env::var("DATABASE_URL").unwrap_or_else(|_| panic!("DATABASE_URL must be set!")), )
            .await
            .unwrap_or_else(|_| {
                panic!("Cannot connect to the database. Please check your configuration.")
            });
        Db(Arc::new(pool))
    }
}- 쿼리 구현 부분에서 sqlx를 사용하고 있다. SELECT는
query_as!, 갱신(INSERT, UPDATE, DELETE)의 경우는query!를 사용한다.
let _ = query("insert into todos (id, title, description) values ($1, $2, $3)")
    .bind(todo.id)
    .bind(todo.title)
    .bind(todo.description)
    .execute(&*pool)
    .await?;

let sql = r#"
    select t.id as id, t.title as title, t.description as description, ts.id as status_id, ts.code as status_code, ts.name as status_name,
    t.created_at as created_at, t.updated_at as updated_at
    from  todos as t
    inner join todo_statuses as ts on ts.id = t.status_id
    where t.id = $1
"#;

let stored_todo = query_as::<_, StoredTodo>(sql)
    .bind(id)
    .fetch_one(&*pool)
    .await?;
Ok(stored_todo.try_into()?)query_as로 SELECT 문을 구현할 경우 SELECT 결과를 저장하는 구조체를 정의해야 하는데 #[derive(FromRow)]를 정의한 구조체이다.
#[derive(FromRow, Debug)]
pub struct StoredTodo {
    pub id: String,
    pub title: String,
    pub description: String,
    pub status_id: String,
    pub status_code: String,
    pub status_name: String,
    pub created_at: DateTime<Utc>,
    pub updated_at: DateTime<Utc>,
}
SQL을 파일에 저장해 분리하여 관리할 수 있는 query_file!” 이나 query_file_as!도 있다.
3. Rust 구현 포인트
-
DTO (Data Transfer Object)를 다시 채우려면 From/TryFrom을 구현한다. 레이어드 아키텍처를 사용하면 레이어 간에 객체를 다시 채울 수 있다. 예를 들어 하위 레이어가 상위 레이어에 의존하지 않는 규칙을 준수할 때 특히 중요하다. 레이어의 데이터 구조를 고치고 피라미터에 전달하는 작업이 필요하다. 레이어로 데이터를 변환하는 등이 이루어지고 있다. TryFrom 트레이트를 가지고 구조체에 추가로 구현해 두는 것만으로, from()이나 into() 같은 함수를 호출해 DTO의 변환을 쉽게 할 수 있다.
-
anyhow를 사용하여 오류를 처리한다. 함수의 Result형은 anyhow::Result로 해두고, 커스텀 에러형을 정의했을 때에는 thiserror로 확장한다.
-
FOR 루프나 패턴 매칭보다 filter나 map 등 어댑터를 사용한다. 이것을 이용하면, 변수의 스코프를 좁힐 수 있게 되어, Rust 특유의 소유권이나 라이프 타임 문제를 일으키지 않고 코딩하기 쉬워진다.
-
tracing을 사용하여 추적한다. 그냥 로그를 찍기 위한 경우는
env_logger를 사용할 수 있으나 이에는 단점이 있다. ERROR 로그에 Request 정보가 없기 때문에 여러 Request를 받고 있을 때 어떤 Request가 에러가 되었는지 판단할 수 없게 되고 async fn에 의해 비동기적으로 실행되기 때문에, 로그 내용이 순서가 뒤섞여 표시되어 추적 관찰하기 쉽지 않게 된다. 그래서 이를 해결하기 위해서는 tracing을 사용해야 한다. tracing을 사용하면, 프로세스 내부의 처리 과정을 추적 관찰할 수 있어서 유용하다. tracing을 사용할려면, 먼저tracing_subscriber를 초기화를 해야하고 각 함수별로 tracing::info!(), tracing::error!()를 쓰면 된다.
아키텍처
1. 레이어별 담당 기능
- controller는 주로 라우터와 서버 구동 부분을 구현한다. 요청/응답 전처리, 에러 모델 정의, JSON의 직렬화 및 역직렬화를 처리한다.
- usecase는 어플리케이션을 처리하기 위해 필요한 비즈니스 로직을 구현한다.
- domain은 도메인 모델의 생성이나, 각종 지표의 산출 로직 등을 구현한다.
- infra는 외부 서비스와의 연계 레이어. DB 접속이나 쿼리 로직을 구현한다.
2. Rust에서 레이어드 아키텍처 구현
Cargo.xml를 정의해 하위 계층에서 상위 계층을 호출하는 위반을 방지할 수 있다. 예를 들어 아래처럼 usecase 레이어는 domain과 infra 경로만 정의되어서 usecase는 controller는 호출할 수 없다.
[package]
name = "todo-usecase"
version = "0.1.0"
edition = "2021"

[dependencies]
todo-domain = { path = "../todo-domain" }
todo-infra = { path = "../todo-infra" }
3. Dependency Injection
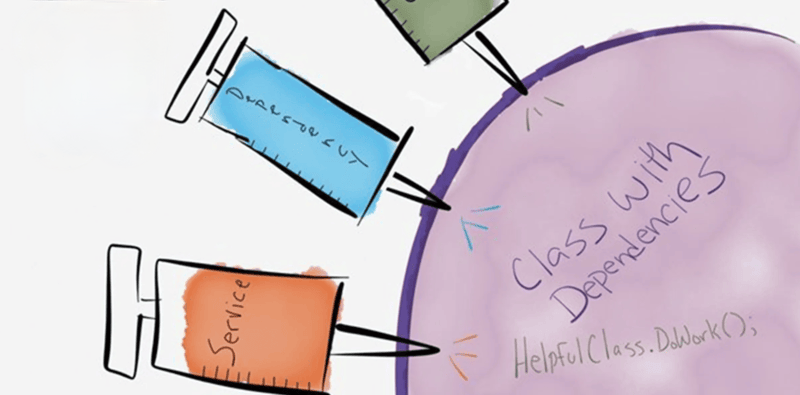
DI는 모듈의 재사용성, 테스트 용이성, 코드를 쉽게 수정할 수 있어 개발 생산성이 올라간다. 여기에서는 생성자 인젝션을 사용했고 구조체에 의존을 주입시키고 싶은 구조체의 필드를 기술해 두고, 내부에서 그것을 사용하는 방식이다.
TodoUseCase 생성자에 Repository를 주입해서 호출해 사용 가능하도록 정의하고 있다. 이렇게 함으로써 controller에서 usercase, domain의 repository로 그다음 구현체인 infra의 repository로 이어지게 된다.
pub struct TodoUseCase<R: RepositoriesModuleExt> {
    repositories: Arc<R>,
}

impl<R: RepositoriesModuleExt> TodoUseCase<R> {
    pub fn new(repositories: Arc<R>) -> Self {
        Self { repositories }
    }
    ....
}
4. DIP(의존 관계 역전)
느슨한 결합 방식을 유지하려면 Dependency Inversion Principle(DIP)]에 대해서 많이 이야기하는데 상위 레벨 정책의 구현 코드는 하위 레벨 세부 사항의 구현 코드에 의존해서는 안된다는 의미이다. domain과 infra에 대해서 DIP가 적용되고 있고 domain의 Repository에 트레이트만 있고 실제의 구현은 infra에서 이루어지고 있다. 호출은 domain만 할 수 있다. 여기서 DIP 적용의 이점은 데이터 소스의 변경이 일어나도, 도메인 레이어나 어플리케이션 레이어의 구현에는 영향을 주지 않는다.
도메인의 Repository는 인터페이스만 구성한다.
#[async_trait]
pub trait TodoRepository {
    async fn get(&self, id: &Id<Todo>) -> anyhow::Result<Option<Todo>>;
    async fn find(&self, status: Option<TodoStatus>) -> anyhow::Result<Option<Vec<Todo>>>;
    async fn insert(&self, source: NewTodo) -> anyhow::Result<Todo>;
    async fn update(&self, source: UpdateTodo) -> anyhow::Result<Todo>;
    async fn upsert(&self, source: UpsertTodo) -> anyhow::Result<Todo>;
    async fn delete(&self, id: &Id<Todo>) -> anyhow::Result<Option<Todo>>;
구현은 infa에 존재한다. DatabaseRepositoryImpl라고 하는 형태는 각 도메인 모델에 대한 Repository의 구현을 의미한다.
#[async_trait]
impl TodoRepository for DatabaseRepositoryImpl<Todo> {
    async fn get(&self, id: &Id<Todo>) -> anyhow::Result<Option<Todo>> {
        let pool = self.db.0.clone();
        let sql = r#"
            select t.id as id, t.title as title, t.description as description, ts.id as status_id, ts.code as status_code, ts.name as status_name,
                t.created_at as created_at, t.updated_at as updated_at
            from  todos as t
            inner join todo_statuses as ts on ts.id = t.status_id
            where t.id = $1
        "#;
        let stored_todo = query_as::<_, StoredTodo>(sql)
            .bind(id.value.to_string())
            .fetch_one(&*pool)
            .await
            .ok();

        match stored_todo {
            Some(st) => Ok(Some(st.try_into()?)),
            None => Ok(None),
        }
    }
    ...
}
5. 모듈
모듈(Modules)이라는 구조체를 만들어서 그것을 실제 DI 컨테이너로 만들었다. 이렇게함으로써 의존 관계를 이해할 수 있게 된다. DI를 다루는 방법은 Axum에는 DI를 구현할려면 Extension과 State를 사용하는 두가지 방식이 존재한다. State는 type safe 하지만, Extension은 그렇지 않다는 것을 알아두면 좋겠다.
impl Modules {
    pub async fn new() -> Self {
        let db = Db::new().await;
        let repositories_module = Arc::new(RepositoriesModule::new(db.clone()));
        let health_check_use_case = HealthCheckUseCase::new(HealthCheckRepository::new(db));
        let todo_use_case = TodoUseCase::new(repositories_module.clone());

        Self {
            health_check_use_case,
            todo_use_case,
        }
    }
}
6. Auth AOP
API를 호출할 때마다 사용자는 누구인지 더 나아가 API 권한 레벨까지 확장할 수 있도록 JWT Token 기반으로 Auth AOP를 구현 되어있다.
pub async fn auth(
    modules: State<Arc<Modules>>,
    mut req: Request,
    next: Next,
) -> Result<impl IntoResponse, AppError> {
    let auth_header = req
        .headers()
        .get(http::header::AUTHORIZATION)
        .and_then(|header| header.to_str().ok())
        .and_then(|header| {
            if header.starts_with("Bearer ") {
                header.strip_prefix("Bearer ")
            } else {
                error!("auth_header not found");
                None
            }
        });
    let auth_header = match auth_header {
        Some(header) => header,
        None => return Err(InvalidJwt("auth_header not found".to_string())),
    };

    match authorize_current_user(auth_header, &modules).await {
        Ok(current_user) => {
            req.extensions_mut().insert(current_user);
            return Ok(next.run(req).await);
        }
        Err(err) => {
            error!("error authorizing user: {:?}", err);
            return Err(InvalidJwt(err.to_string()));
        }
    }

    async fn authorize_current_user(
        auth_token: &str,
        modules: &Modules,
    ) -> Result<UserView, AppError> {
        let claims = decode::<TokenClaims>(
            auth_token,
            &jsonwebtoken::DecodingKey::from_secret(modules.constants.jwt_key.as_ref()),
            &jsonwebtoken::Validation::default(),
        );

        match claims {
            Ok(claims) => {
                let user_id = claims.claims.sub;
                let user_view = modules.user_use_case().get_user(user_id).await;
                match user_view {
                    Ok(user_view) => match user_view {
                        Some(uv) => Ok(uv.into()),
                        None => Err(InvalidJwt("user not found".to_string())),
                    },
                    Err(err) => {
                        error!("Unexpected error: {:?}", err);
                        Err(InvalidJwt(err.to_string()))
                    }
                }
            }
            Err(err) => {
                error!("Error decoding token: {:?}", err);
                Err(InvalidJwt(err.to_string()))
            }
        }
    }
}
DB 트랜젝션
sqlx에서 Pool과 Transaction을 모두 받을 수 있다. sqlx::Acquire 라는 트레이트를 아래와 같이 구현한다.
pub trait PostgresAcquire<'c>: Acquire<'c, Database = Postgres> + Send {}
impl<'c, T> PostgresAcquire<'c> for T
where
    T: Acquire<'c, Database = Postgres> + Send,
{}
이것을 레포지토리의 함수에 executor: impl PostgresAcquire<'_> 파라미터 추가하면 usecase 레이어 레벨에서 데이터 베이스 트랜젝션 제어가 가능하게 되었다.
API 문서화
Rust로 구현한 API용 문서를 쉽게 만들려면 utoipa라는 크레이트가 유용하다. actix-web, axum, warp, tide, rocket 등 다양한 웹 프레임워크도 지원하고 있다.
실제 API를 문서화하기 위해서는 먼저 TodoApi의 문서를 정의(paths와 components의 schemas를 추가)하고 Router에 TodoApi를 merge해 준다.
let mut openapi = OpenApiBuilder::default()
    .info(Info::new("axum-rusty API", "1.0.0"))
    .build();
openapi.merge(TodoOpenApi::openapi());
...
let app = Router::new()
.merge(SwaggerUi::new("/swagger-ui").url("/swagger.json", openapi))
...

#[derive(utoipa::OpenApi)]
#[openapi(
    paths(get_todo, find_todo, create_todo, update_todo, upsert_todo),    components(schemas(JsonCreateTodo, TodoQuery, JsonUpdateTodoContents, JsonUpsertTodoContents, ApiResponse<Value>)),    tags((name = "Todo")))]
각 API별로 utoipa::path를 지정해 주면 된다. 요청 Json이나 응답 Json 구조체일 경우는 ToSchema를 지정해 주고 Query라고 하는 형태에 URL 쿼리 파라미터를 지정하는 경우는 IntoParams을 지정해 주면 된다.
#[utoipa::path(
    get,
    path = "/v1/todos/{id}",
    operation_id = stringify!(get_todo),
    responses(
    (status = OK, description = "Get one todo successfully", body = ApiResponse<Value>)),
    tag = "Todo",)]
pub async fn get_todo(
    _: ApiVersion,
    Path((_v, id)): Path<(ApiVersion, String)>,
    modules: State<Arc<Modules>>,
) -> Result<(StatusCode, Json<ApiResponse<Value>>), AppError> {


